
Learn how to route calls dependent upon selections made by the caller with SecureCo Inbound Management Studio
Step 1.
After login, in Services, click Create New Service button.
Step 2.
In the Create New Service modal window, select the client account you wish from the drop-down menu. Next, select Interactive Service and then click Confirm to continue.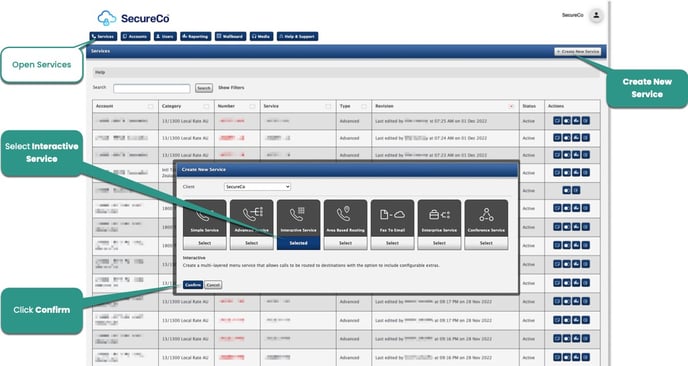
Step 3.
You can start configuring the simple service by entering a name. This name is used for identification purposes.
Step 4.
Next, assign numbers from your account to the new service. One or more DDI numbers can be attached to the service. You can search for numbers or filter by category.
Step 5.
Configure Main Menu Settings by entering the Menu Name and selecting the Audio file outlining the options that will be played to the caller. Optionally, Click Availability to specify opening times (e.g. Mon - Fri, 9:00-17:00)
You can now set five additional configurable extras on the service by sliding the switches to the ON position, when actioned this will turn GREEN, and any configurable settings will be displayed.
- Pre-Connection greeting: When uploaded, this audio will be played to the caller once they dial into the service before the menu message is played to the caller.
- Out of Hours: set what happens to calls outside of business hours.
- Disaster Recovery: Set what you want the service to do during an emergency. An existing plan within the account can be selected, or a new one created by selecting the relevant radio button.
- Date Exception: This feature allows you to pre-specify certain dates/times where you want something apart from the normal call routing to happen, for example, on a bank or public holiday.
- Caller Exception: This feature is used to treat callers calling from pre-registered numbers differently. These may be specific numbers you wish to treat as a priority and send directly to a special team. It could also be numbers you wish not to get through to the service, where you can play a message and terminate the call or request that they leave a voicemail.
Step 6.
Configure Main Menu Structure by setting up to 10 options on a menu to suit your business requirements. First, name your option and then select the action required for that menu from the following;
-
Advanced: Divert the caller to a destination. (For help configuring, please refer to How to Create a ‘Advanced Service’)
- Menu: Direct the caller to another pre-configured menu, creating a multi-level IVR service.
- Service: Divert the caller to another pre-configured service within your account.
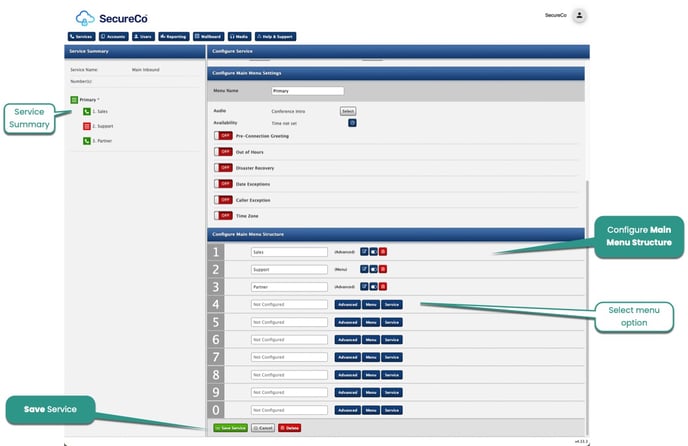
Once the option has been named and the action selected, the new menu options will appear on the service summary (left-hand panel) in red. Red indicates the option has not yet been configured
Step 7.
Once you have configured your Interactive Service and clicked on the save button, you will be presented with a Service Summary confirmation page.
If you are satisfied that the service configuration is correct, click Confirm Service, and it will be made live.